JAGUAR Mk X 3.8 Litre 1961-65 Workshop Manual | PDF Download
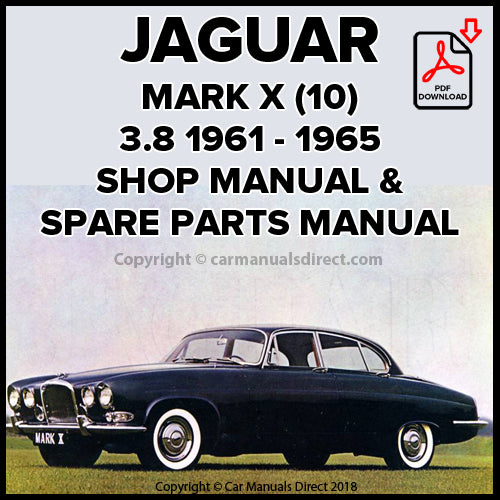
JAGUAR Mark X 3.8 Litre 1961-1965 Factory Workshop & Spare Parts Manual | PDF Download

JAGUAR Mark X 3.8 Litre 1961-1965 Factory Workshop & Spare Parts Manual | PDF Download.
This Jaguar Workshop Manual is for the following Jaguar Cars made between 1961-1965.
- Jaguar Mark X 3.8 Litre Saloon
Below is a comprehensive list of information in this Mark X Jaguar Service Manual.
- GENERAL INFORMATION
- Car Identification
- General Data: Dimensions and weights
- Capacities
- Performance Data
- Operating Instructions: Instruments, Controls and accessories, Wheel changing, Starting and driving
- Overdrive Operating Instructions
- Automatic Transmission, Operating and Maintenance
- Summary of Maintenance
- Recommended Lubricants and Multi-grade Engine Oils
- Recommended Hydraulic Fluids
- Service Tools
- Service Departments
- Conversion Tables
- ENGINE
- Air Cleaner
- Bottom Chain Tensioner: Removal & Refitting
- Camshafts: Removal, Refitting, Overhaul
- Compression Pressures
- Connecting Rod and Bearings: Removal, Overhaul, Refitting
- Big-end bearing replacement
- Crankshaft: Removal, Overhaul, Refitting
- Crankshaft Damper and Pulley: Removal, Overhaul, Refitting
- Crankshaft Rear Oil Seal: Removal, Replacing the Seal, Refitting
- Cylinder Block: Overhaul
- Cylinder Head: Removal, Overhaul, Refitting
- Decarbonising and Grinding Valves
- Engine-Removal and Refitting
- Engine-To dismantle
- Engine-To assemble
- Engine Mountings
- Engine Stabilizer
- Exhaust Manifolds: Removal, Refitting
- Flywheel: Removal, Overhaul, Refitting
- Ignition Timing
- Inlet Manifold: Removal, Refitting
- Oil Filter: Removal, Refitting
- Element replacement
- Oil Pump: Removal, Dismantling, Overhaul, Reassembling, Refitting
- Oil Sump: Removal, Refitting
- Pistons and Gudgeon Pins: Removal, Overhaul, Refitting
- Routine Maintenance
- Sparking Plugs: Service procedure, Analysing service conditions, Standard gap setting
- Special Tools
- Tappets, Tappet Guides and Adjusting Pads: Removal of tappets and adjusting pads, Overhaul
- Timing Gear: Removal, Dismantling, Overhaul, Assembling, Refitting
- Valves and Springs: Removal, Overhaul
- Valve clearance adjustment
- Refitting
- Valve Guides: Replacement
- Valve Seat Inserts: Replacement
- Valve Timing
- CARBURETTERS AND FUEL SYSTEM
- Description
- Throttle spindle glands
- Idling
- Routine Maintenance
- Lubricate carburetter piston damper
- Checking carburetter slow running
- Cleaning carburetter filters
- Fuel pumps
- Fuel feed line filter
- Carburetters: Removal, Refitting
- Cleaning the suction chamber and piston
- Carburetter tuning
- Float chamber fuel level
- Centring the jet
- The auxiliary starting carburetter: Adjustment
- Thermostatic Switch: Removal, Refitting
- Accelerator Linkage: Adjustment
- THE FUEL SYSTEM
- Fuel Pumps: Removal, Refitting, Servicing instructions
- Fuel Tanks: Removal, Refitting
- Fuel Tank Gauge Units: Removal, Refitting
- COOLING SYSTEM
- Routine Maintenance
- Checking the radiator water level
- Care of the cooling system
- Frost Precautions: Anti-freeze
- Engine heater
- Radiator: Removal, Refitting
- Radiator Cowl: Removal, Refitting
- Fan: Removal, Refitting
- Fan Belt: Removal, Refitting
- Thermostat: Removal, Checking, Refitting
- Water Pump: Removal, Dismantling, Checking, Reassembly, Refitting
- Water Temperature Gauge
- Pressure Testing Radiator Cap and Cooling System
- CLUTCH
- Routine Maintenance
- Clutch fluid level
- Clutch pedal free travel
- Hydraulic System-General Instructions
- Bleeding the System
- Flushing the System
- Removing and Refitting a Flexible Hose
- The Master Cylinder: Removal, Renewing the Master Cylinder Seals, Master Cylinder Push-rod-Free Travel, Refitting
- The Slave Cylinder: Removal, Dismantling, Assembling, Refitting
- The Clutch Unit
- Clutch Cover Assembly
- Release Bearing
- Pedal Adjustment
- Removal of Clutch: Dismantling, Assembling
- Adjusting the Release Levers
- 1. Using a Borg and Beck Gauge Plate
- 2. Using the Churchill fixture
- 3. Using the actual Driven Plate
- Refitting
- Data for Clutch Lever Tip Setting
- Fault Finding
- GEARBOX
- Gearbox Ratio Data
- Data
- Routine Maintenance
- Gearbox-To remove and refit
- Gearbox-To dismantle
- Dismantling the mainshaft
- Dismantling the constant pinion shaft
- Gearbox-To reassemble
- Checking layshaft end float
- Assembling the mainshaft
- Assembling the 2nd gear synchro assembly
- Fitting the 2nd gear assembly to the mainshaft
- Assembling the 3rd/top synchro assembly
- Fitting the 3rd/top synchro assembly to the mainshaft
- Assembling the constant pinion shaft
- Assembling the gears to the casing
- Fitting the top cover
- Fitting the rear cover
- Fitting the clutch housing
- OVERDRIVE
- Operation
- Construction
- Operating Instructions
- Dismantling and Reassembling
- Removing the overdrive from the gearbox
- Inspection
- Reassembling the overdrive rear casing
- Pump
- Refitting the overdrive to the gearbox
- The Relief Valve
- The Dashpot
- Rotary Solenoid Valve
- The Pump
- AUTOMATIC TRANSMISSION (Linkage and Controls)
- Description
- Anti-Creep System
- Data
- Automatic Gear Changes
- Recommended Lubricants
- Routine Maintenance
- Operation
- Service Adjustments
- Accelerator to Governor Lever Adjustment
- Starter Cut Out and Reverse Light Switch
- Manual Selector Cable Adjustment
- Anti-Creep Throttle Switch Adjustment
- PROPELLER SHAFT
- Routine Maintenance:
- Front Propeller Shaft: Removal, Refitting,
- Rear Propeller Shaft: Removal, Refitting
- Centre Bearing: Removal, Dismantling, Reassembly, Refitting
- Divided Propeller Shaft Alignment
- Checking-in the horizontal plane
- Checking-in the vertical plane
- Adjustment of engine stabilizer
- The Universal Joints: Examine and check for wear, Dismantling, Assembling
- REAR AXLE
- Routine Maintenance:
- Checking the oil level
- Half shaft lubrication
- Rear wheel bearing lubrication
- Changing the rear axle oil
- The Axle Unit: Removal, Refitting
- The Rear Hubs: Removal, Dismantling, Assembling
- Hub bearing end float
- The Half Shafts: Removal, Refitting
- The Universal Joints: Checking for wear, Dismantling, Assembling
- The Differential Unit
- The Output Shafts: Removal, Dismantling, Assembling, Refitting
- Removing the Differential Assembly from the Carrier
- Dismantling the Differential Assembly
- Pinion removal
- Dismantling the differential unit
- Assembling the differential unit
- Checking the differential unit for wear
- Pinion adjustment
- Differential bearing preload and drive gear adjustment
- Final assembly
- Tooth contact
- Ideal contact
- High tooth contact
- Low tooth contact
- Toe contact
- Heel contact
- Backlash
- Drive gear and pinion movement
- Special Tools
- STEERING
- Routine Maintenance
- Checking the reservoir oil level
- Steering tie rods
- Oil reservoir filter
- Steering idler housing
- Recommended Lubricants
- Operation:
- Steering in the straight ahead position
- Steering on lock
- The Steering Unit: Removal, Dismantling, Assembling
- The Top End cover
- The Rocker shaft cover
- Rocker shaft adjustment
- Replacement of top end cover oil seal
- The Reservoir: Dismantling, inspection and reassembling
- Bleeding the System
- The Pressure Pump: Operation, Removal, Dismantling, inspection and assembly, Refitting
- Fault finding
- High steering effort
- Noise
- Oil leaks
- Steering Idler Assembly: Removal, Dismantling, Assembling, Refitting
- Lock Stop Adjustment
- Front Wheel Alignment
- Steering Arm: Removal, Refitting
- Tie Rod: Removal, Refitting
- Track Rod: Removal, Dismantling, Assembling,
- Steering Wheel: Removal, Refitting
- Steering Column: Removal, Dismantling, Assembling, Refitting
- Lower Steering Column: Removal, Refitting
- Accidental Damage
- Special Tools
- FRONT SUSPENSION
- Routine Maintenance: Hydraulic dampers, Wheel bearings
- Front Suspension Assembly: Removal, Refitting
- Hydraulic Dampers: Removal, Refitting
- Coil Springs: Removal, Refitting
- Coil spring packing pieces
- Wheel Hubs: Removal, Dismantling, Refitting
- Bearing end float adjustment
- Stub Axle Carriers: Removal, Refitting
- Lower Wishbone: Removal, Fitting the rubber/steel bushes, Refitting
- Lower Wishbone Ball Joint: Removal, Dismantling, Reassembling
- Adjustment of the ball joint, Refitting
- Upper Wishbone: Removal, Dismantling, Fitting the rubber/steel bushes, Reassembling, Refitting
- Upper Wishbone Ball Joint: Removal, Refitting
- Castor Angle Adjustment
- Camber Angle Adjustment
- Anti-Roll Bar: Removal, Fitting the link arm bush, Refitting
- Accidental Damage
- Special Tools
- REAR SUSPENSION
- Routine Maintenance:
- Recommended lubricants
- Rear Suspension: Removal, Refitting
- Road Spring and Hydraulic Damper Assembly: Removal, Refitting
- Hydraulic Dampers: Removal, Refitting
- Radius Arm: Removal, Refitting
- Wishbone: Removal, Refitting
- Wishbone Outer Pivot: Removal, Dismantling, Reassembly, Bearing adjustment, Refitting
- Inner Fulcrum Wishbone Mounting Bracket: Removal, Refitting
- Rear Wheel Camber - Adjustment
- Accidental Damage
- Special Tools
- BRAKES
- Retractor Operation
- Handbrakes
- Routine Maintenance
- Brake fluid level
- Brake fluid warning light
- Footbrake adjustment
- Handbrake cable adjustment
- Examining the friction pads for wear
- Renewing the friction pads
- Recommended brake fluids
- Bleeding the Brake System
- Brake Overhaul-Precautions
- The Brake Pedal Box Assembly: Removal & Refitting
- Brake linkage-dismantling
- Brake linkage-assembling
- Setting the operating lever
- The Master Cylinders: Removal, Renewing the master cylinder seals
- Master cylinder push-rod-adjustment
- The Front Calipers: Removal, Refitting
- The Rear Calipers: Removal, Refitting
- The Front Brake Discs: Removal, Refitting
- The Rear Brake Discs: Removal, Refitting
- Brake Disc "Run-out"
- Renewing the Friction Pads
- Renewing the Brake Piston Seals
- The Handbrake: Operation
- Friction pad carriers-removal
- Friction pad carriers-dismantling
- Friction pad carriers-assembling
- Friction pad carriers-refitting
- Handbrake Cable Adjustment
- Renewing the handbrake friction pads
- Removal and refitting the handbrake cable
- Removing and refitting the handbrake control
- The Brake Fluid Level and Handbrake Warning Light
- Handbrake warning light switch-setting
- The Bellows Type Vacuum Servo
- Dismantling the unit
- Reassembling the unit
- Fault finding
- Checking the servo unit for vacuum
- The vacuum reservoir and check valve
- Special Tools
- WHEELS AND TYRES
- Road Wheels
- Tyres
- Inflation Pressures
- Tyres - General Information
- Construction of the Tyre
- Removing and Fitting of Tyres
- Tyre Examination
- Wheel Alignment and Its Association with Road Camber
- Tyre and Wheel Balance
- Static Balance
- Dynamic Balance
- Tyre Replacement and Wheel Interchanging
- BODY AND EXHAUST SYSTEM
- Side Facia Panel: Removal, Refitting
- Glove Box: Removal, Refitting
- Screen Rail; Removal Refitting
- Bonnet: Removal Refitting
- Bonnet Hinge Assembly: Removal Refitting
- Bonnet Lock: Removal of the right-hand lock Refitting the right-hand lock
- Removal of the left-hand lock Refitting the left-hand lock
- Removing the bonnet release lever Refitting the bonnet release lever
- Removing the bonnet lock striker pegs Adjustment of the striker pegs
- Chrome Strip on Bonnet: Removal Refitting
- Mascot: Removal Refitting
- Radiator Grille and Surround: Removal Refitting
- Luggage Compartment Lid and Hinges: Removal Refitting
- Luggage Compartment Locks: Removal Adjusting the locks Refitting
- Petrol Filler Lids: Removal Refitting
- Front Bumper: Removal Refitting
- Front Bumper Over-riders: Removal Refitting
- Rear Bumper: Removal Refitting
- Rear Bumper Over-riders: Removal Refitting
- Windscreen: Removal Refitting
- Rear Glass
- Front Door and Hinges: Removal Refitting
- Rear Door and Hinges: Removal Refitting
- Adjusting the door torsion spring
- Front and Rear Door Trim Casings: Removal Refitting
- Front Door Window Frame and Glass: Removal Refitting
- Rear Door Window Frame and Glass: Removal Refitting
- Front No Draught Ventilator: Removal Refitting
- Rear No Draught Ventilator: Removal Refitting
- Front Window Regulator (Manually Operated): Removal Refitting
- Rear Window Regulator (Manually Operated): Removal Refitting
- Front Window Regulator (Electrically Operated)
- Rear Window Regulator (Electrically Operated)
- Front Seats and Runners: Removal Refitting
- Rear Seat and Squab: Removal Refitting
- Polished Wood Cappings: Removal of centre pillar capping Refitting
- Removal of screen capping
- Removal of screen pillar capping
- Removal of rear quarter cant rail capping
- Removal of rear cant rail capping
- Removal of courtesy light and capping
- Removal of front cant rail
- Transmission Tunnel Cover and Console: Removal Refitting
- Parcel Tray: Removal
- Heater Duct Control: Removal Refitting
- Door Lock Mechanism: Removal of lock mechanism
- Removing the remote control unit
- Removing the lock unit
- Removing the outside handle base plate assembly
- Removing the outside handle
- Removing the striker unit
- Refitting the lock mechanism
- Refitting the remote control unit
- Aligning the lock assembly
- Refitting the outside handle base plate assembly
- Connecting the push button mechanism
- Fitting and adjusting the striker unit
- Master check for correct alignment
- Front doors
- Rear doors
- Lubrication
- Accidental Damage: Replacing the body panels
- Checking the Body Underframe Alignment
- Checking for distortion in the horizontal plane
- Checking for distortion in the vertical plane
- Welding Methods
- Spot welding
- Breaking spot welds
- Gas welding
- Breaking gas welds
- EXHAUST SYSTEM:
- Removal
- Refitting
- HEATING AND WINDSCREEN WASHING EQUIPMENT
- CAR HEATING AND VENTILATING SYSTEM
- EARLY TYPE
- Heater controls
- Fan Switch
- Air Distribution
- Vacuum Servo Unit: Description
- Heater Unit: Removal Refitting
- Heater Matrix: Removal Refitting
- Vacuum Supply Tank: Removal Refitting
- Vacuum Servo Unit (Scuttle Ventilator): Removal Refitting
- Vacuum Servo Unit (Heater Flaps): Removal Refitting
- Fan Motor: Removal Refitting
- Heater Water Control Valve: Removal Refitting
- Fan Switch: Removal Refitting
- Air Temperature Control Panel: Removal Refitting
- LATER TYPE
- Heater Controls
- Off
- Heat
- Air
- Vacuum System
- WINDSCREEN WASHING EQUIPMENT
- Operation
- Warning
- Filling-up
- Cold Weather
- Adjusting the Jets
- Jet Nozzles: Cleaning
- Lubrication
- ELECTRICAL AND INSTRUMENTS
- Battery
- Data
- Routine Maintenance
- Removal
- Refitting
- Persistent Low State of Charge
- Recharging from an External Supply
- Preparing New Unfilled, Uncharged Batteries for Service
- Preparing New "Dry Charged" Batteries for Service
- Distributor
- Removal
- Refitting
- Ignition Timing
- Routine Maintenance
- Servicing: Dismantling, Bearing replacement, Reassembly
- Distributor Test Data
- Flasher Units
- Information
- Fuse Unit
- Information
- Generator Model C.48
- General
- Routine Maintenance
- Removal
- Refitting
- Performance Data
- Servicing
- Horns
- Removal
- Adjustment
- Refitting
- Lamps
- Light Bulbs
- Headlights: Description
- Beam Setting
- Outer Headlight Replacement
- Inner Headlight Replacement
- Sidelight Bulb-Replacement
- Front Flasher Bulb-Replacement
- Rear Flasher Bulb-Replacement
- Rear/Brake Light Bulb-Replacement
- Number Plate Light Bulb-Replacement
- Reversing Light Bulb-Replacement
- Interior Light Bulbs-Replacement
- Glovebox Light Bulb-Replacement
- Flashing Indicator Bulb-Replacement
- Overdrive/Automatic Selector Bulb-Replacement
- Map Light Bulb-Replacement
- Indicator Strip Bulbs-Replacement
- RB 340 Current and Voltage Regulator
- Preliminary Checking of Charging Circuit
- Voltage Regulator Adjustment
- Current Regulator Adjustment
- Cut-out Adjustment
- Cleaning Regulator Contacts
- Cleaning Cut-out Contacts
- Starter Motor
- Removal
- Refitting
- Routine Maintenance
- Performance Data
- Servicing
- Starter Drive
- Routine Maintenance
- Dismantling and Reassembling
- Windscreen Wiper
- Maintenance
- Removal of Wiper Motor and Cable
- Disconnecting the Cable
- Refitting
- Removal of Wheelboxes
- Refitting
- Fault Diagnosis
- Testing
- ELECTRICALLY OPERATED WINDOWS:
- Removal of Window Regulator
- Refitting of Window Regulator
- System Employed on Early cars
- System Employed after Later cars
- Driver's Control Switches
- Rear Passenger's Control Switches
- Miscellaneous
- Intermediate Speed Hold Switch: Removal Refitting
- Electric Clock: Removal Adjustment Refitting
- Brake Fluid and Handbrake Warning Light: Renewing the Bulb
- Flashing Indicator Control: Removal Refitting
- Overdrive Switch: Removal Refitting
- Wiring Diagram
- Wiring Diagram
- Instruments
- Screen Rail: Removal Refitting
- The Instrument Panel: Opening Removal Refitting Closing
- The Glove Box: Removal Refitting
- Side Facia Panel: Removal Refitting
- Speedometer: Removal Refitting
- Revolution Counter and Clock: Removal Refitting
- Revolution Counter Drive: Removal Refitting
- Removal of the Instrument Panel Components:
- Ignition Switch
- Cigar Lighter Element
- Cigar Lighter Unit
- Starter Push Button
- Head and Side Light Switch
- Tumbler Switches
- Ammeter and Oil Pressure Gauges
- Fuel and Water Temperature Gauges
- Voltage Regulator
- Switch Indicator Strip
- Engine Temperature, Fuel Tank Contents and Oil Pressure Gauges
- Operation of the engine temperature gauge
- Operation of the fuel tanks gauge
- Operation of the oil pressure gauge
- Analysis of faults (Engine Temperature and Petrol Gauge)
- Analysis of faults (Oil Pressure Gauge)
- Speedometer Cable: Removal Refitting
- Speedometer Cable-General Instructions
- Speedometer-General Instructions
File Format: PDF
Language: English
Print: Print the complete manual or just the pages you require
Bookmarked: Bookmarked for easy navigation
Requirements: We recommend using Adobe PDF Reader for best results
Device: We recommend downloading to a PC or Laptop or visit our Download Help Page for further information regarding Smart Devices
Images are Copyright©Car Manuals Direct and are used for promotional purposes only.
Copyright©Car Manuals Direct 2018

